I thought I would start this blog with the planting of my tulips, with another how to plant up the pots tutorial so here we go.
First let me just say this is a first for me, I’ve never grown Tulips before with that said I hear a lot of people say that Tulips are hard to get to flower for the second year were as a lot of people also say that they have had Tulips flower year after year so we shall see.
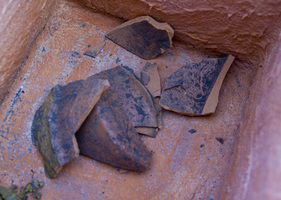
First select your pot and add large bit’s for the drainage holes I’ve found some terracotta in the garden this is my last old pot so I will have to keep a look out for some old pots at the local tip.
First let me just say this is a first for me, I’ve never grown Tulips before with that said I hear a lot of people say that Tulips are hard to get to flower for the second year were as a lot of people also say that they have had Tulips flower year after year so we shall see.
First select your pot and add large bit’s for the drainage holes I’ve found some terracotta in the garden this is my last old pot so I will have to keep a look out for some old pots at the local tip.
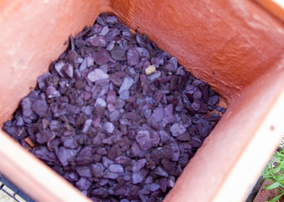
I’m a keen or should I say I love terracotta pot but these two are fiberglass this is Unknown material to me, back to planting my Tulips. After laying the terracotta into the bottom of my pot I added grit for drainage about 20 mm of grit
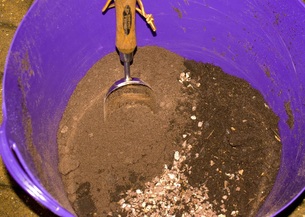
Next is to fill the pot up with compost, grit and fertilizer. I have mix equal parts John Innings number one only because I have it and like the soil type compost. I mix this with the cheaper compost as It has lots of fiber in it. Then I add my grit into the mix.
Tip
only mix small amounts in one bucket and add to a larger bucket because you will find it hard to mix if you mix all your compost at the same time.
as this next photo shows
Tip
only mix small amounts in one bucket and add to a larger bucket because you will find it hard to mix if you mix all your compost at the same time.
as this next photo shows
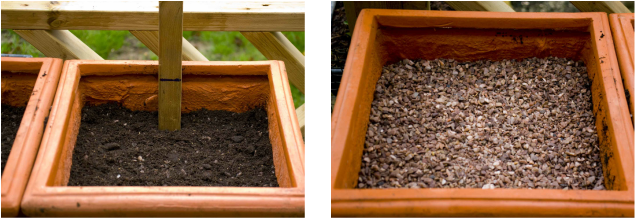
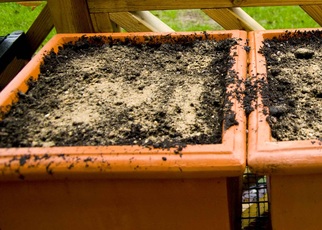
Next I fill my pots to within 3 bulb high from the top of my pots I water my compost and leave it this is just me I then just leave for two to three hours to allow it to sink because it will. I then add about 20mm compost & grit to my pots just to stop the bulbs from falling over when I place them in the pots as this next photo shows
after Ive placed my Tulips in my pot I will add a marker because I always make pots with a front and back in this case it's by colour Blue heron at the front and Green star at the back

I thought I would add extra F,B&B meal to the Top before I add my grit I did add this fertilizer to the Compost as I was mixing
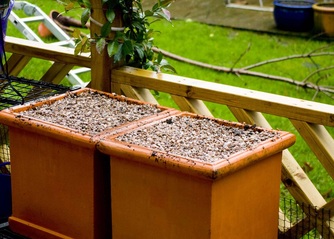
I finish filling my pot to with in 10mm off the top because I want to add some grit to the top to suppress weeds and retain water.
I have add a label to my pots But you don't really want a photo of this. Pots are done But after the spring I will be adding Slug pellets to the pots as I've just read slugs will attack Tulip foliage. I am going to use egg shells next year but I've only just started to save them by this really cool technique wash eggs shells and then when you have your oven on after cooking place them in the oven on a baking tray to dry off any egg white left on the egg will be cooked so no contamination from the egg is left and then crush and shore in a air tight container
I'm not going to take credit for the eggs in the oven it was suggested on gardeners world Forum at http://www.gardenersworld.com
Well that it for this week as I'm busy I the garage painting my pallets collars I bought of Ebay for raised flower/Vegetables beds. I've also made a start on my front garden but I will keep that story back for when I'm nearly finished clearing the bushes and brambles.
Well that it for this week as I'm busy I the garage painting my pallets collars I bought of Ebay for raised flower/Vegetables beds. I've also made a start on my front garden but I will keep that story back for when I'm nearly finished clearing the bushes and brambles.
 RSS Feed