Google Webmaster Tools
 
Hello fellow Gardeners

Life around my garden is slowly coming to life.

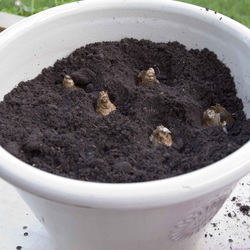
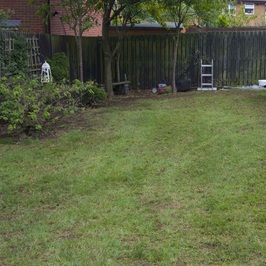
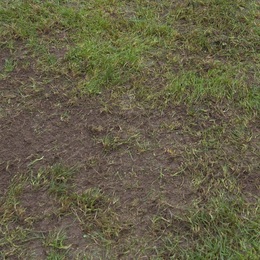
Looking at the ground we are very wet under foot but do you think that’s going to stop the weeds from growing I wish all my mulched boarders have perennial weeds growing also I have noticed my lawn is getting thicker. With winter bulbs like Daffodil, tulips breaking soil and gravel into the freedom of light spring is on its way. But please don’t be fooled in to thinking the freezing winds and frost and snow will not arrive because I’m sure it will, it’s just a matter of time. OK that said it’s not going to stop me from sowing seed and buying plugs and plants.

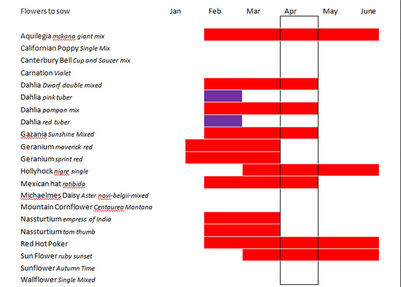
First on my list of seeds to grow this year is Red Geranium in fact it’s called sprit red these will be planted with white geranium plug plants  I bought way back in September, of  which I have just woken up by starting to water them from the bottom up.

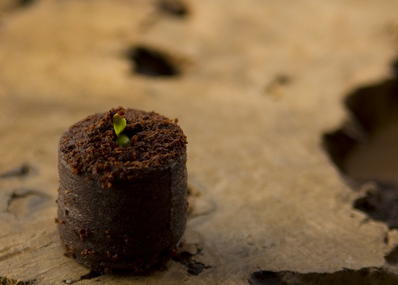
For the first time I have used jiffy peat pot in a unheated propagator made for these little peat pot that just swell up and grow in size when you water them. Now I don’t really like these little post as I think the netting restricts the growth of mature plants especially the stems, with that in mind I’m going to slice the netting before I pot on.

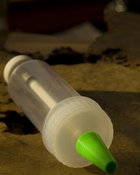
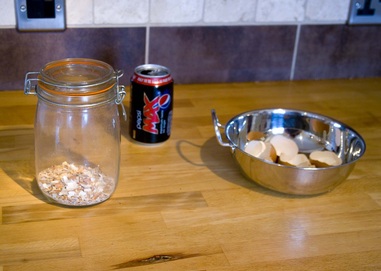
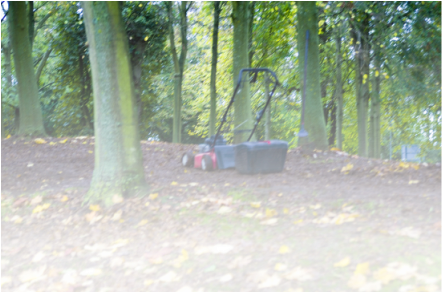
Next on my list of seeds to sow is Trailing lobelia, trailing Pentunia, white & pink. To aid sowing of these fine seed I’ve enlisted the help of a seed sower as pictured below.

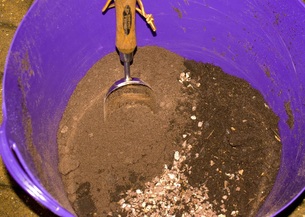
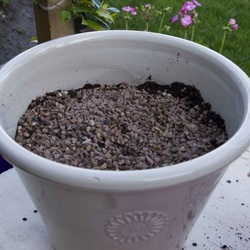
So the first step in sowing is the mix some sowing compost, now I normally just fill a seed tray and firm down and throw the seeds in then struggle to thin out.

But not this year No Sir I’m going to work smarter and not harder so I treated myself to some plug cells, I have cut the cells down to fit inside a standard seed tray for supporting the plug tray

 Back to mixing the compost. I’m using Growise seeding compost mixed with perlite 2:1 and a top dressing of vermiculite which will be watered before seed sowing from the bottom.

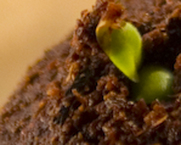
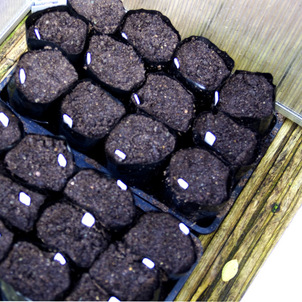
Here are my first seedlings of the year with lots more to come. Geranium sprint red with a good germination success of 99 % but I removed the tray top to early and one of the seedlings must of got cold overnight and died off, still 18 out of 20 seeds germinated is still a good result  I used a jiffy propagator in my living room window.

So now what am I going to do well it’s too wet outside to work on my greenhouse but I do have all materials for the footing and with just the mixer to hire that will do for now. While I’m waiting for the greenhouse I’m going to build a temporary hot bed/propagator out of one grow bag trays as time waits for no man and with very little money left for this month’s exploits temporary is all I can afford.

On with a budget heated propagator

Materials needed for this project

Grow bag tray ……………………………..as deep as you can find I had a spare one but can pick up for £2.99

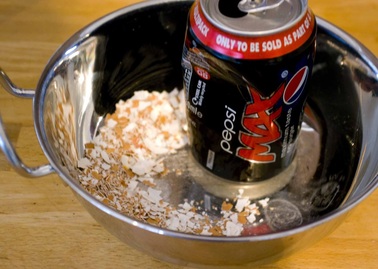
Fine sand …………………………………….25kg should do a grow bag tray £2.00

Heated cable ………………………………….5 meters £18.99 35 watt rating so cheaper to run than a reading light

A thermostat…………………………………I bought mine from ebay at about £7.00

Blue tack to plug up the cable hole

Tools needed

Tape or cable clips to hold the cable in place

Two pieces of wood to set the depth of you sand and a tamper

A drill with a drill bit to match your heated cable


total cost £32.00 and is working quite well
 
Hello all

Well this is the first entry of a New Year so I would like to wish you all a Happy New Year.
Right what have I been up to for the first week or two of the New Year?

Buying new seeds, seed trays, compost, perlite and Vermiculite also on the way (in the post) I have water matting, heat cable with a thermometer. So while I’m waiting for my items to land in my letter box I’m busy making newspaper pots for giveaway plants.

My wife bought me the pot making kit for Christmas and quotes every time she see me make the pots” Ooo’that’s the best present I’ve ever bought you” well she doesn’t have to stand there and make the post up as I soon found them to be a labour of love. But please don’t tell her LOL

Right while the weather has been damp well a bit more than damp I did have a bright day last week where I managed to get in to the garden. I ran around like spring hare so I put up my fence at last did some digging (new flower bed) for my Dahlia’s, foxglove’s  & coneflowers.

I also moved some flower pots around the garden, to my surprise I have daffodils and crocus breaking through the tops of my pots exciting well it is for me.

Today is Wednesday 8th January with a nice temperature of 11 degrees so I thought I would turn my compost bin over and add some shredded newspaper to the mix.


Below is a small list of flowers I'm sowing this year my other page will be updated later as and when I sow them


Well Christmas is over until next year so now all my energy is concentrated on spring sowing. I hope like me you’ve got your compost, seed trays seeds and a plan of attack on how to proceed. I must admit I have a plan but I do have a slight bump in the road in that I’m going away on holiday right in the middle of sowing season for three weeks so advice would really be nice.

Yes three weeks holiday lucky me. So I will be lost in action at Disney but what to do with my seeds when I’m away do I sow my seeds before I go or sow then when I return on the 12th April. If I didn’t have a house sitter I would sow and place my seeds in the living room bay window as It has the sun most of the day and turn the heating off with plastic and a watering mat before I go But that’s not going to happen. So do I also consider sowing my seeds and arrange seed trays in my conservatory before I go away. It’s already quite full in the conservatory but as it’s unheated the germination will be slowed down a bit.

After finding out I had mould growing in my  conservatory I have moved my bay tree outside and started to open the door and a window just to keep the air flowing so I will just have to see if the add air flow stops the mould growing.

I ripped out a plum tree that self-set in a flower pot nature is really quite surprising really take a look at this tree It must have been growing quite happily in this pot for about eight to ten years  and was as high as my apex on my conservatory  so about 2.5 meters

Just a small update My sweet peas have germinated so the news paper has come off

Today is Sunday the 29th while there is a light frost on the ground I intend to arrange some potted bulbs around the garden and if the weather stays bright I'm going to attack my fence and turn my compost over water and cover. I'm in the middle of making news paper pot and found quite quickly there are a labor of Love .
 
I thought I would start this blog with the planting of my tulips, with another how to plant up the pots tutorial so here we go.

First let me just say this is a first for me, I’ve never grown Tulips before with that said I hear a lot of people say that Tulips are hard to get to flower for the second year were as a lot of people also say that they have had Tulips flower year after year so we shall see.

First select your pot and add large bit’s for the drainage holes I’ve found some terracotta in the garden this is my last old pot so I will have to keep a look out for some old pots at the local tip.

I’m a keen or should I say I love terracotta pot but these two are fiberglass this is Unknown material to me, back to planting my Tulips. After laying the terracotta into the bottom of my pot I added grit for drainage about 20 mm of grit
Next is to fill the pot up with compost, grit and fertilizer. I have mix equal parts John Innings number one only because I have it and like the soil type compost. I mix this with the cheaper compost as It has lots of fiber in it. Then I add my grit into the mix.

Tip
only  mix small amounts in one bucket and add to a larger bucket because you will find it hard to mix if you mix all your compost at the same time.

as this next photo shows

Next I fill my pots to within 3 bulb high from the top of my pots  I water my compost and leave it this is just me I then just leave for two to three hours to allow it to sink because it will. I then add about 20mm compost & grit to my pots just to stop the bulbs from falling over when I place them in the pots as this next photo shows
after Ive placed my Tulips in my pot I will add a marker because I always make pots with a front and back in this case it's by colour Blue heron at the front and Green star at the back
I thought I would add extra F,B&B meal to the Top before I add my grit  I did add this fertilizer to the Compost as I was mixing
I finish filling my pot to with in 10mm off the top because I want to add some grit to the top to suppress weeds and retain water.
I have add a label to my pots But you don't really want a photo of this. Pots are done But after the spring I will be adding Slug pellets to the pots as I've just read slugs will attack Tulip foliage. I am going to use egg shells next year but I've only just started to save them by this really cool technique wash eggs shells and then when you have your oven on after cooking place them in the oven on a baking tray to dry off  any egg white left on the egg will be cooked so no contamination from the egg is left and then crush and shore in a air tight container
I'm not going to take credit for the eggs in the oven it was suggested on gardeners world Forum at http://www.gardenersworld.com 

Well that it for this week as I'm busy I the garage painting my pallets collars I bought of Ebay for raised flower/Vegetables beds. I've also made a start on my front garden but I will keep that story back for when I'm nearly finished clearing the bushes and brambles.  
 
Morning all its Saturday 16th November 2013
The weather is quite still today so I thought I would start by jet washing my patio as it’s the only place apart from dog walking were my dogs can relief them self’s . As I say it’s very clam and pleasant; just a little bit damp under foot. Now that the patio is clean it’s on to blowing the leaves of the lawn as I want to fertilize with autumn 2-1 later on today.

After I’ve blown and collected the leaves I think  it’s time to dig over my flower beds and add the bags of farm manure I keep tripping  over  also on my list of things to do this weekend is cut back a bush plus a rose tree  back once this is done I also intend to add farm manure. Farm manure was added to my Jasmin about two weeks ago however I did add toilet roll around the stem first just to stop the farm manure burning the plant. The same will be added to the base of my bush.

I have also to do on my list is pot up two wallflowers in to a heavy glazed terracotta pot along with two campanulas I bought a while ago. I going to stop writing about it a go and do some work I should return with photo’s see you later I spoke to soon went out to dig the flower beds, guess what IT’S RAINING CATS AND DOGS I did plant up my wall flowers and raked the lawn before the rain started O’well such is life.

So it’s now Monday but its raining again forecast for Tuesday is bright sun shine so we will just have to see.

I think I will sow some sweet peas at some point today however I have to repair the cold frame as the wind has knocked the stuffing out of it.

First I do wish to apologize for the slight delay in my blog; due to ill health I’ve not been in my garden for a two to three weeks


So what do I expect to do this week?

Well I did say I would sow my sweet peas, first I had to repair my cold frame as the high winds last month kicked it around my garden. The repair was quite easy as I just ran a bead of sealant along the rebate for the plastic, so now it’s screwed down on my decking just for the winter/spring.

Sweet peas I have bought are as follows

  •   Lathyrus odoratus "Black Knight"
  •   Orange Henry Eckford
  •   White Dorothy Eckford
So after I ordered the wrong plastic bag growing pot/bags I was directed to a sweet pea web site.

Here http://www.eaglesweetpeas.co.uk/gallery.php?g=8  where they have advice, materials also how to do videos.

Little tip; use john innings SEED compost.

After I potted up my plastic pots/bags I watered and then added my seeds, No need to soak or cut the seeds as they will be just fine without this treatment.

I placed grit in the bottom of a seed tray and placed my pots/bags on top just to keep the air flowing around the pots/bags and then placed them in to my cold frame also as instructed I placed news paper on top with a mouse trap,  done !
I’m not expecting them to germinate for about 3 to 4 weeks but I shall be keeping my eye on them.
So what else have I been up to well I’ve started My compost bin, also started to clear the site where it’s going however while it’s still in my garage waiting to have the inside finished I’m going to seal it with fence paint inside and out after two to three coats of this I’m going to add the weed barrier stuff only to prolong the life of the wood. The Timber care fence paint is no smelling so after it’s dry it shouldn’t harm my compost material.
I've done some research on how best to start a compost bin off.
what does this mean well I don't want to waste any of my garden waste that I've been collecting since o'about august "what little I have" so starting the compost bin is a really important. Lets just take a look at what will turn garden waste in to organic matter well rotting involves bacteria and fungus but also the very common garden worm is needed to help to break down all that lovely garden waste. well believe it of not horse manure is teaming with it, SO OFF I GO in search of this wonder full stuff. I will keep you up dated of my travels in finding this manure. Next to the green matter we need air in the compost bin also to help break down the vegetation so we use a layer of brown this includes cardboard, news paper, BUT NOT GLOSSY MAGAZINES, and if like me you have hedges chipping from these also stems.

so I plan to add a layer of cardboard, horse muck and then my green waste and so on 
 
I’m keeping on top of the leaves on the lawn with raking every  four to five days  just into a pile at the bottom of the garden for the wild life I never get but hay that might be different this year as I’m keeping my dogs out of my garden to protect my lawn.

I’ve also started clearing the front garden of brambles and the odd conifer I even managed 5 hours on Saturday with the shredder which I can highly recommend it’s so quiet. filling, cutting and loading a shredder you need three hands so I glues a magnet to hang my pruners off. I'm very pleased with it as it works very well.
I also won a second shredder on Ebay last week for £1.75 this is a very noisy beast but I only bought it for shredding leaves I’ve collected without using my lawn mower.

The hopper on the second shredder is a bit bigger that my quiet machine.

Atco machine crushes the material while the lawn shredder machine cuts but has a U shape blade on top of the spinning cutting blade to stop it getting blocked, but at £1.75 the machine is worth it just for the cable and plug LOL

Sunday was a really nice day so I painted my shed with the echo’s of a pheasant shoot filtering into the garden I didn’t need the radio as memories of a childhood in the country came flooding back it was chilly but turned out to be a perfect day.

Today is Wednesday 4th December with plans to locate my compost bin and turn my currant compost over and add to the newly made compost bin.

Also today I hope to clear some more of my front garden.

while I'm still clearing the front garden I still have other jobs to do. I'm planning to finish my fence this week and also plant up my tulips so until next time keep on digging clueless but with direction
Comments left

KEF


Enjoying your blog

Verdun

Hiya James. First visit to your blog. Interesting and may become addictive!
Compost bin looks excellent. I have 2 ....the larger is homemade with brickwork and a hinged aluminum lid. The other is a largish plastic dalek type. Could use more bins.
Look forward to reading more


Heather

Great blog James. Hoping I'm one of the 100 visitors you want to achieve today x


Nutcutlet

Hi James
Keep up the good work. Nice record of progress.


It’s pay day for me this week. Well what does that mean for the Garden?

 Plans I have for this month is as follows

Two new planter for my Tulips but don’t worry they aren’t going
to be planted up just yet as it’s still quite warm, I plan to plant my tulips
the first week in December .I’ve also got planed a compost bin to make as my
plastic bins are full now so I shall be adding the contents of these bins to my
compost box I plan to make. I’ve been quite busy collecting leaves from around
my town.

Last week I collected about a ton of leaves from across the road
from my house also last weekend I collected a further ton with the aid of my
lawnmower the ton is not in weight but in volume I have a ton builders bag well
two bags that are filled. I have also sowed my sweet peas  
with the aid of a friend from Gardeners world forum. Which later on in
the blog I shall show you how I did it.
I also have bought more wood to add another panel to my fence I
will add photos of my fence next week.
I’m also hoping to concrete my greenhouse footings this month so
I can finish building my green house in March all the seals and clips have been
bought with the exception of the door seals and some glass panels but water and
electricity are on the site of the green house. I have also bought a garden
shredder, so plans to clear the front garden are under way in fact I have
started to cut the branches of some trees just to test the shredder, wow this
shredder is quiet and has not needed to be unblocked once. The shredder is one
that crushes the material rather than spins a blade. I bought it from ebay for
£70.00 which I think a good price as they retail new for around £340.00, I just
had to adjust the setting knob as the shredder has two settings squash and shred
but when I bought it, it only squashed the material I was
shredding.
 On to the leaf collection. I rang the Hospital up first to get
permission from the head of the estate so with that done I’m collecting Leafs.
With the trailer loaded with a rake, lawnmower, spare fuel and gloves I’m off to
do my bit for the Hospital and myself.
I arrived at the hospital at around 10.00am on Saturday knowing I
would be able to collect quite a substantial amount of leaves for my garden but
what I didn’t count on was the amount of already rotted down leaves that must
have been there for years so now with my new collection of this and last year’s
leaves I expect I could use my leaf mould as early as late spring. After the
rain came down quite heavy at 11.30 I was beat however I’m going back on Sunday
with just a rake and wheelbarrow to collect some of the rotted leaves I would
think most off the rotted leaves I shall be using in my garden next year but I’m
also going to add them to a big bag of leaves that was collected without the aid
of my lawnmower to mix with them to speed up the rotting process. 

This first Photo shows the area I have to pick from But it’s only
part of the story as there is a bigger area behind
me.
After raking the leave into a long thin pile I started up my Lawnmower But soon found out that this is not the best way to collect with a lawnmower as it stalls far too easily also it struggles to hover up the leaves, I think because they are so wet also far to compact


This next photo shows what I collected; big mistake was using a ton bag as I had to empty quite a lot out of it to lift it in to my trailer; so lesson learnt wheelbarrow next time straight into the trailer

I’m now safely in my own garden, the grass seeds I sowed three weeks ago are now showing signs of germination. Now I’ve read that when they are two to three inches tall it’s time to cut. One reason is because it will be competing with the grass that’s already growing  so it’s out with the lawnmower then as the grass has recovered from the raking and aerating it had I shall apply Autumn fertilizer.
It’s important that you use autumn fertilizer as it feed the roots this will help the grass fight of diseases over the winter and in to the spring.

No Sunday I planed to do so much in my garden but I'm fighting a chest infection so I way laid up in bed all day with a high temperature so
I didn't get into the garden I even missed a secondhand Fuel tank of ebay for my lawnmower of which I was going to pay up to £25.00 as they don't come up very often I was out bid on my first bid by only fifty pence it went for £6.50 I was gutted as I was going to go all the way up to £25.00 never mind. So today I feel much better but it's raining so I will run out and collect my Dahlias from my pots with the idea I can trim and leave to dry in my greenhouse for a week or two.

First take a look at this my Dahlias should be bright flame red with a yellow center maybe  someone could explain why they have faded to just yellow , I believe it has something to do with the plants energy being diverted to tuber growth?

I shall try to find a photo from the summer just to show the colour difference but I change my computer this year, So I think the photos from the summer are on that hard drive. Surprised me Saturday night left a slight frost on my car front windscreen this is the first of the year how ever the frost was just found on my car.I will leave the sweet peas & compost bin until the next up date as I'm busy trying to clear the front garden between rain showers. More leaf collection for me this weekend.  
 
Monday 4th November 2013


Hello every one that’s reading my Blog and hello to new friend I
haven’t had the pleasure of greeting yet. It’s been a funny sort of week and
although I been busy with the doctors, dentist and a Hospital appointment for a
pacemaker check I’ve still found time to potter around in the garden, I thought
I would also clean the conservatory roof hopefully to raise the internal
temperature and light levels as I put an external thermometer up outside which
is a really sensitive one and also a rise and fall thermometer in the
conservatory just to assess the temperature
difference.


After two or three days I found an average reading of 4 degrees
which is I think is quite a significance difference for the structure is
unheated and not insulated yet, the more I think about insulating the
  conservatory the more I think it’s a bit of an over kill however we’ve not had
  the cold arctic winds yet from the north yet and as the conservatory is double
  glazed I might  just insulate the
roof as this is polycarbonate 10mm


As I was a way on holiday last week I did find I enjoyed my sort
break from the garden on one hand however I found myself eager to start getting
ready for the early winter jobs. First on my list of things to do is collect the
leafs from my newly sowed lawn I know it’s only been two weeks since I worked on
my lawn, I do find myself running out every morning with excitement looking for
grass seeds that have germinated, with a little chuckle to myself while I wright
this blog none to date but I’m forever optimistic I now deep in my heart it will
be another week or two before I see any grass that has germinated but hay I’m an
impatient male. Also last time I did a reseed nothing happened  


Well that’s it for this week off now to clean the patio were the
dogs can only pee and poo as I’ve blocked there accesses to the garden and my
newly seeded grass the poor little devils have be denied the grass for around
three week at first they objected to having no grass to run around with weeing
and number two’s in the Kitchen but now they are quite happy to do there bits on
the patio


I get the old dog escaping well the big one Springer also the
larger Yorkshire terrier (my god can he jump) This little fellow can jump on to
the Kitchen worktop if no one is watching, legs like a flea comes to
  mind.


Anyway that’s it for this week


Kind regarded a clueless
gardener


Moira
Loved the leaf collecting bit. The fact that you are doing the hospital a favour as well as yourself and making use of stuff that no one else wants. Like me, you are learning on the job. Collecting leaves in a tonne bag seems like a good idea until you try and lift it lol. Keep the blog going enjoy reading it very much :)
 
 Hello my friends


First, Have you had your Flu injection this year ?
 
Well this week has been a complete wash out with  the weather rain  rain plus more rain, on the days we haven’t had rain I’ve not been able to get  into the garden  But I say no more. So I  have decided to plant some more pots up with miniature iris  and daffodils  (Large Cupped Salome) also so some of the cutest smallest dwarf  daffodils (February Gold) I have received my tulips this week from parkers with some
free patio tulips.

 So I shall we see how they go and grow I’ve read  some very  horrifying stories about plants, bulbs plugs alike from this supplier but we will see. Ok tulips are best planted in December or so I’ve  read.

Why? 

Well it’s claimed that they require the cold to set the flowering part of the bulb and planting any sooner would aloud the bulb to wake up to  early. Also a very important information some tulip’s will only flower for two or three year and then they will need replacing. So for this purpose I’m going to write the date  on the underside of my pot so I can record this.
 
So I’m going  to try and give you a step by step guide to how I planted my daffodils with images of each  stage.
 
Here we go 

First I found some bits of terracotta pots for covering the drainage holes, my sorry but I couldn’t find my camera in time to take a image,  OK I forgot to take a  photograph but take it from me there is terracotta in the bottom of my pots.


Second stage


 I mixed John Inning’s number three with equal parts Arthur bower’s general purpose compost,  any
compost will do, I only bought this as it was on offer. I then filled my pot to within 10 cm from the top.
 
Third stage
 
I added some granulated fertilizer proceeded by a layer of grit, I’ve been told that bulbs  don’t like to have their feet wet I also didn’t want the bulbs sitting on top of  the fertilizer and burning/rotting. I then added a
little layer of the mixed compost to the pot just so the bulbs didn’t fall over.
Picture


Forth Stage 

I’ve been told It doesn’t  really matter which way a daffodil is planted however I’m not going to go there with it for the beginner I’m going to plant my bulb the right way around, now you may be asking well which way is bottom and is there a top well to that question I will answer yes there is a bottom and a top so here
is an image of a iris bulb.

As you can see the bulb is pear shaped. You plant the bulb with the thickest part of the bulb in to the soil first with the thin tip pointing up so it can cut through the soil. 


So after I placed my daffodils in my pot  I covered them with my compost mix. Watered them in and when the soil level drops as I’m sure it will I will add some gravel to the top.
Picture


So after I placed my daffodils in my pot I covered them with my compost mix. Watered them in and when the soil level drops as I’m sure it will I will add some gravel to the top.

I hope you enjoyed my step by step guide to planting bulbs, I’m not saying this will work but this is all the information I have found on the internet and in my gardening books.
 
I’m always open the advice and comments good or bad and if I’ve done some think wrong or you have a different way of planting your bulbs please I would love to know.


Friday is a dry day form me so I’m going to poo pa scoop and work on my lawn as we have had some nice wet weather over the last week or two with more rain expected over the weekend it a great time to add Autumn granulated fertilizer to my lawn.

Picture


First I shall aerate the lawn and this is what my poor lawn looked like after aerating and raking I have it on good authority the lawn will love this drastic mess and come back next year stronger, healthier also thicker
than ever as all things in gardening it’s a waiting game so we shall see next year .  I then add a light covering of top soil with added grass seeds I shall redress my lawn with this mixture and fill in pot holes , I will leave the fertilizer until the spring as with all the work that has gone into the lawn the grass will (in my view) stressed, but a good rule of thumb is you never feed a stress plant.

I should really take a photo of what the lawn looks like now as it look a complete mess but I'm for ever hopeful it's going to grow back better and stronger even greener but as all things in gardening you have to wait.
that's it for this week I hope you enjoyed my new blog

Anthony
I have my Flu injection this week lol
nice pics and clear info James well done
p.s I am sure the lawn will come back even better
 
Morning all not a lot to report this week, I fallen over and
  twisted my ankle again but not before I finish cutting the wooden frame for the
  greenhouse base.


You may be saying well he’s spending a lot of time and money on
the green house base. Well it’s like this I have a very uneven garden and in the
two meters I have a fall of around eight  inches, maybe more but I want maximum
soil on the inside of my greenhouse without losing it to footing also I want to
add some wooden posts to the inside of the green hose to attach wire for my
  tomatoes also money is a big factor. The wood I picked up was on sale 6x2.4m
  decking wood sealed for only £18.00 I think it was a bargain and it’s thicker
  than most decking at a whopping 32 mm were as the decking that I already have
  is only 20 mm (this needs replacing next year as a chair with me sat on it
  broke through a big knot. This this also were I intend to pinch the wood from
  for raised beds and compost bin I shall be cutting the wood and routing my
  posts for this project later is month.


Not to miss out on free compost I have my green  waste
this year in to green bins I use for recycling I may even keep it  going
in a plastic bin and just empty it out after two or three months. I keep a
bucket it the garage for when I have muddy boot on just to pee in and then I
empty it on to my compost bin.


I have also started to collect leaves for my garden but I only
have three smallish trees and a neighbouring tree that will soon just sneeze and
shake all its leaves at any time all over my garden however like Monty did last
week was to take his lawnmower out to his lawn and collect leaves for composting
I’m going to do the same but I’m taking my lawnmower down the local walk way/
park and bag it up to take home (only about 300 yards and I’m
  collecting).


I have to re-pot some herbaceous perennials the names I have
  forgotten but I will have a look on line as to their names but these need
  re-potting as I haven’t decided where I’m going to plant them and they are
  beginning to look pot bound.


Ok I’ve found the names of the plants I need to re-pot  


Papaver “double tangerine” Spanish 
poppy


Picture


Papaver “double tangerine” Spanish  poppy

Picture


 Echinacea Pallida “coneflower”
Purple
flower

Echinacea Paradoxa  “coneflower” Yellow
flower

I know it  looks a little bit  empty at the moment I hope to fill it with my hope dreams and  desires  also
on-projects  which at the moment have doubled in  size.
Anthony
looks good I will follow your blog as well as gardeners world forum
all the best Jame

Google Analytic